Windows 10 has a fantastic set of built-in security tools. In recent years, Windows Defender, the built-in antivirus for Windows 10, has performed as well as (and sometimes even better than) the major third-party suites.
Many of Windows 10’s security features are turned on by default, such as Windows Defender’s real-time malware scanning and scheduled quick scans. Still, there are items that are either not enabled by default or have a lot more to offer than you may realize at first glance.
Here are five Windows 10 security tools that are well worth knowing about.
Scan options
 IDG
IDG
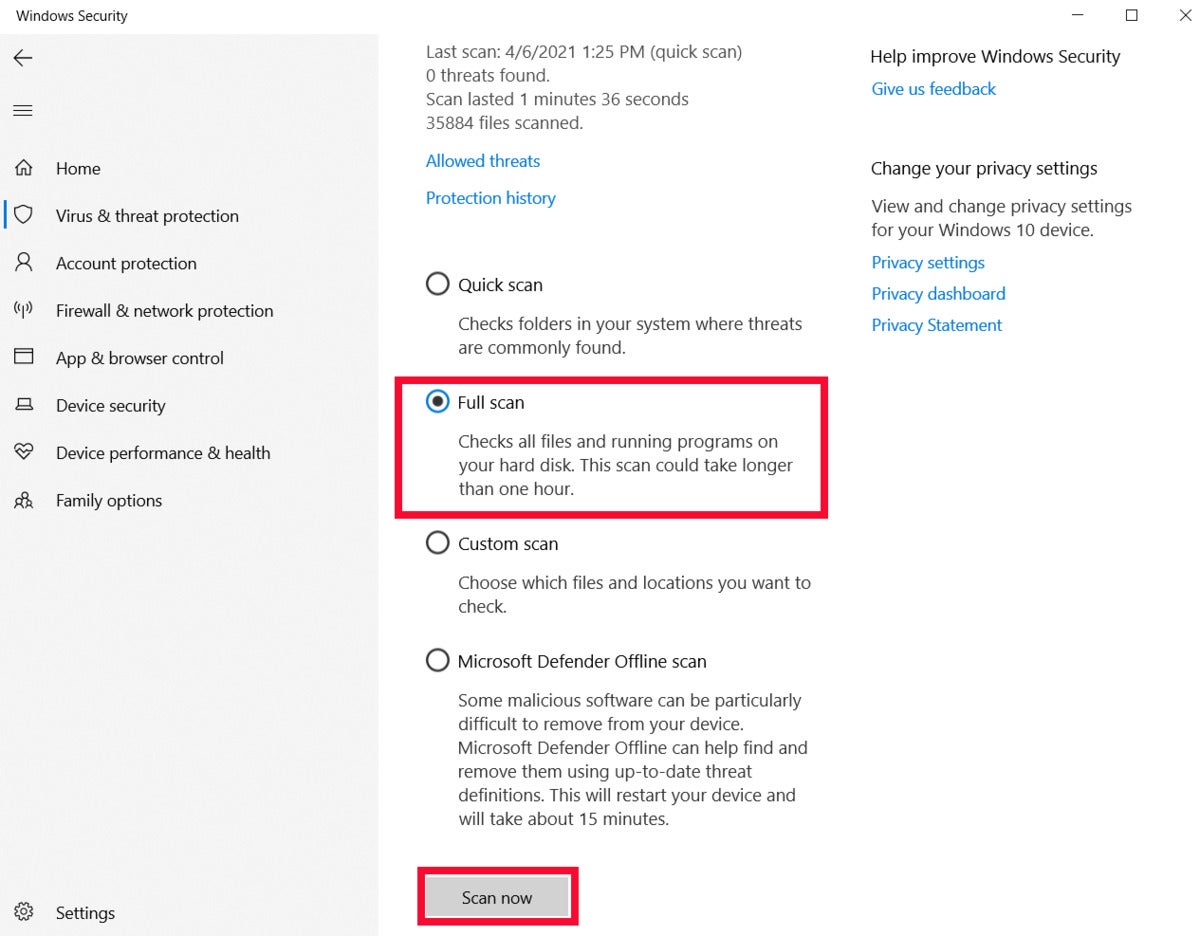
Windows Defender’s scan options.
You can easily get by with Windows Defender’s automated scanning regime, but did you know you can carry out manual scans just like third-party antivirus suites? By default, Windows Defender carries out a quick scan that checks the places in your system that malware is most likely to hide.
If you’d like to go deeper, however, there’s a full scan option. To access it, click on the Windows Defender shield icon in the system tray. When Windows Security opens select Virus & threat protection. Then in the next screen under “Scan options” select the Full scan radio button, scroll down to the bottom, and select Scan now.
While it’s easy to run a manual scan, scheduling a full scan to run every week is not so easy since it requires using Windows 10’s Task Scheduler.
Parental controls
 IDG
IDG
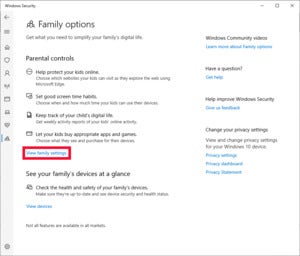
Launch Windows 10’s built-in parental controls from the Windows Security app.
Microsoft provides a full suite of parental controls that are particularly effective when you live in a Windows 10 world. For this feature to work your children will need to be signed-in to Windows PCs or an Xbox with their own Microsoft email accounts, not local accounts.
You can use parental controls to set screen time limits, create content filters, and restrict certain apps and games. You can even give your children an allowance to spend on apps and games and monitor their purchase history. If they’re carrying a laptop with them you can also locate their devices on a map.
To get started with parental controls in Windows 10, open Windows Security and then select Family options > View family settings. This will launch a website where you can manage parental controls.
System restore point
 IDG
IDGThis is not a security feature per se, but it shares the same goal as many security programs, namely system integrity.
It’s always good to have a fallback position in case something goes wrong with your PC. Windows 10 provides options to reset your PC, but that wipes out all installed programs (you can choose not to erase personal files) with a fresh copy of Windows. A system restore, on the other hand, returns your PC to its last known good state.
This can be a helpful tool when you accidentally mess up your system, or you want to try to get rid of an annoying program that won’t uninstall. It can also help neutralize some mild forms of malware if they haven’t affected your system restore points, and then a deeper malware scan can usually get rid of what’s left.
A System Restore will not help you retrieve lost personal files and documents. For that you need regular backups.
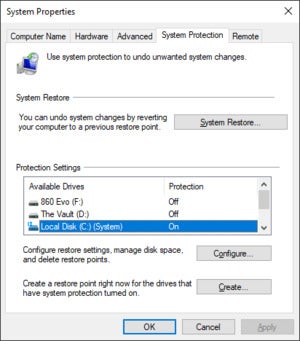
Having a system restore point is just a good idea. To activate System Restore type “system restore” into the desktop search bar, and select the “Create a restore point” option. This opens an old school, tabbed utility window. Select the disk that says (System) next to it (usually C:) and select Configure.
In the next window that opens select the Turn on system protection radio button. If you’d like to set a maximum usage for a system restore you can also adjust the slider under Disk Space Usage.
Once that’s done, hit Apply and OK and then close the original window or hit OK again.
Memory Integrity
 IDG
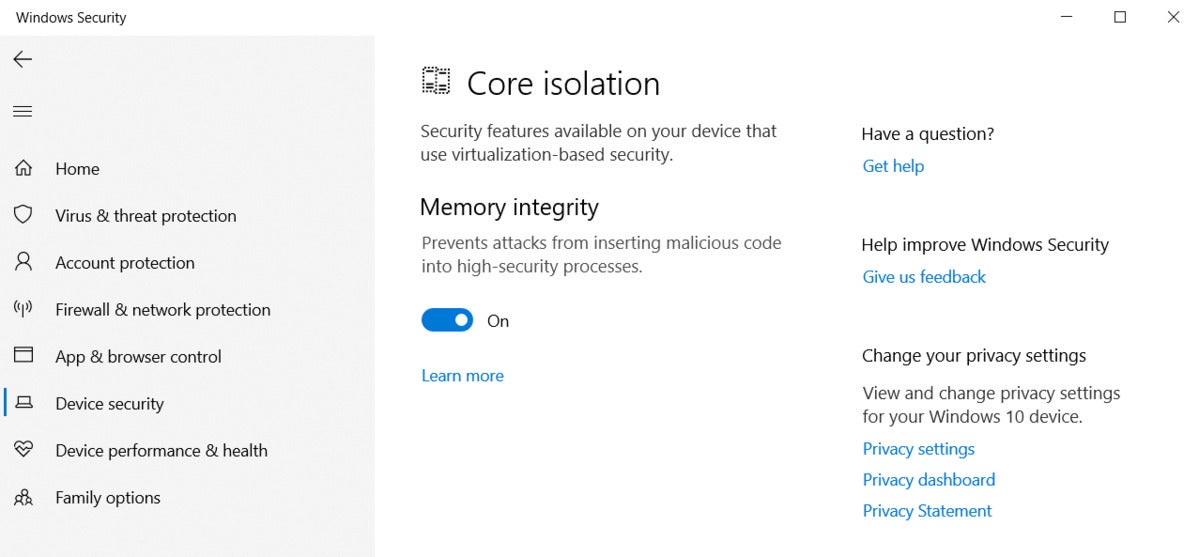
IDGMemory Integrity is a security feature that’s part of a larger set of security features within Windows 10 called Core Isolation. The basic idea with Memory Integrity is that it creates a virtualized environment inside a chunk of system memory. This environment is isolated from the rest of the system and runs critical Windows processes that make sure system drivers and other important processes haven’t been tampered with. The idea is that by isolating this activity it’s much harder for advanced malware threats to get into core parts of your system.
Memory Integrity can be active out of the box on newer PCs, but if you have an older system, or you built your own desktop PC, it probably isn’t. There can be several reasons for this. For starters, third-party developers are still making their code compatible with this security measure, which means the feature can cause problems with some older device drivers.
If you built your own PC then Memory Integrity may not even be supported as it requires a trusted platform module (TPM) 2.0 chip. This can be either a physical chip built into the motherboard or a software-based TPM called an fTPM—both are enabled via the BIOS when available. Virtualization programs like Oracle’s VirtualBox or VMWare can also have issues when Memory Integrity is active, which is a problem that’s mostly a problem for developers and power users.
Clearly, Memory Integrity is not for everyone right now. The good news is Microsoft does a scan of your system before activating the feature to make sure Memory Integrity can run.
To activate Memory Integrity open the Windows Security app then go to Device Security > Core Isolation > Core isolation details. Then under “Memory Integrity” turn the feature on using the slider button.
If your PC starts to experience issues after turning this feature on you can turn it off using the same set of steps.
Dynamic Lock
 IDG
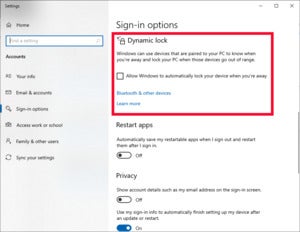
IDGIf you’d like to lock your PC automatically when you’re away from the computer Dynamic Lock can help. After pairing your phone to your PC via Bluetooth you can automatically lock your device whenever your phone is out of range.
It’s dead simple to set-up if your PC has Bluetooth. Start by connecting your phone to your PC via Bluetooth. Open the Settings app by tapping Windows key + “I”. Next go to Devices > Add Bluetooth or other device then in the next screen that opens select Bluetooth. Then select your phone and follow the instructions to pair the devices.
Next, activate Dynamic Lock by navigating to Settings > Accounts > Sign-in options. Then under “Dynamic lock” click the checkbox that says “Allow Windows to automatically lock your device when you’re away.”
That’s it.
You don’t necessarily need to use all of them, but knowing about these Windows 10 features can help make your PC more secure.
